Saturday 14 February 2015

Confrontation Perforation

In this blog post we will have a look at the rules behind how ranged attacks are performed and wounds are dealt.


Wounds from hits are rather simple. Roll 2D6. The lower determine the location. The higher of the two dice is added to the attackers strength (or for a ranged weapon the strength of that weapon), and the resilience of the target is then removed. This determined the wound level inflicted.


There are 5 wound types. A Stunned wound causes -1 to Aim, Attack, Defense stats and damage rolls. This wound remains for a turn and when inflicted never increases the level of the current wound. Light Wounds are like Stunned, but permanent unless healed. Then there are Serious Wounds, that are same expected with a -2 modifier, and with Critical Wounds dealing a -3 modifier. Wounds of a more serious nature supersede the current wound. So model that has a Light Wound, if dealt a Critical Wound, is now at the Critical Wound level. If the wound dealt is of a lower or equal level to the current wound level, then the wound level of the model is increased by a degree of severity. Stunned results of course do not do this to current wounds, and the Stunned result is not cumulative with current wounds. However a Stunned result has to be marked because it can influence other powers.


Line of sight for shooting is simple enough. Models have a 180° line of sight to the front of their bases. LOS is blocked by obstacles and models that intervene, if that model or obstacle is larger than both the target and the fighter shooting. A target is partially visible if the obstacle or intervening model is smaller than the target or the fighter shooting.

Firing a weapon of course relies on the fighter's AIM value, which is 0 or higher in order for them to be able to shoot. Weapons have three ranges listed, which mark the limits of short, medium, and long ranges. These ranges set the base difficulty of the shot. If a model moves it makes the shot harder by +1. If the target has moved under cover, the shot is harder by +2. If the target is at a different altitude level (flyers can enter different altitudes), the shot is harder by +2. And if the target is in cover, the shot is harder by +1.


Next time we will look at the wonderfully different and somewhat complex issue of close combat.

Thursday 12 February 2015

[Battle Report] Hybrid - The Heroes' Twilight

Laboratory SO25 - Part 2

There are still some surprises in store for Ambrosius as he throws himself hell-for-leather into the exploration of laboratory SO25. AS his troops are setting the charges that will destroy the lab once and for all, he hears moaning in the distance.

Ambrosius uncovers a secret passage, and steps inside. Many old friends and battle companions who he believed were dead are imprisoned there, waiting patiently for someone to free them from their morbid destiny. But still the guards must be vanquished.


So the last mission of the boxed game! Final battle!

The Griffin player (this time me) is limited to a total rank of 7 and 5 models. The Dirz player (Ben) has a total of 8 in rank and models. I'm going to be outnumbered or there is going to be some big monster.

Griffin:
Venerable Ambrosius
Misericorde
3 Purifiers

Dirz:
Aberration
Tiger of Dirz
Keratis Warrior
Neuromancer

Yeah, lots of big monsters!


I start the game with just Ambrosius and Misericorde entering the board from the entrance on the left of the map. The other models are in the cells highlighted blue. They're locked in until a model activates objective 1. Objective 2 will open the exits to the top of the map, through which I need one model to escape.

Taking the lead, Ambrosius enters the board, and quickly makes a direct route to Objective 1, and is soon chased by the Aberration. Misericorde, while a formidable warrior, chooses to ignore the monster in her way, and runs past looking to defend Ambrosius. The other Dirz creatures and clones are on their tail, while the Neuromancer (alone in the chamber to the bottom right, while all the other Dirz fighters started in the top chamber) went to activate the event counter nearby. A swarm of insects filled the laboratory, hampering any attempts at using firearms. Not good for the Griffin.


The Dirz got the lead, and the Keratis warrior chased after Ambrosius and inflicted two wounds upon him (backstrikes!) using his massive sword and the vile tentacle that erupted from the warrior's back. Ambrosius turned to face his opponent and moved back, opening the door before firing his gun. He missed (not surprising with all the bugs and wounds he was suffering from). Ambrosius called upon a holy blessing of Fortification. The Tiger of Dirz stalked off down the corridor, looking to defend the exit from the lab.

Misericorde moved to fight the Keratis warrior. She missed with Hauteclair, but empowered by the aura, she was ready to block the door and so defend the old man. She held her ground as the Aberration roared through the small door and lashed out at her, tearing into her arm. The force should have sent her flying and shattered her bones, but the aura allowed her to stand strong.

Misericorde took the lead and moved about the Keratis warrior, circling him. She had donned a blessed pendant, and with her holy sword smote the Keratis warrior. The Dirz creatures lingered in the dark, seeking to prepare for the Griffin warriors to escape. Ambrosius tried to use a healing aura on Misericorde, but it did not work, and so she shouted for the old man to go release their comrades.


Soon enough the Griffin warriors were free, with Misericorde holding the corridor with her rifle at the ready. Soon enough their released comrades were there, rearmed, providing covering fire for each other. One Purifier rushed off into the dark and found the leaver that would open the exit.

With his comrades covering him, and the growling of the Tiger just beyond the door, Ambrosius called upon the aura of Fortification, and one of the Purifiers ran out, hoping to escape and bring reinforcements. A crossbow bolt missed his head, fired by the Neuromancer that lurked with the Tiger. Escape was so close, and he could hear beyond the large door the hulking Aberration.


Misericorde saw her chance. She raised her blade to the sky and invoked Merin to bless her. Her wound was staunched and she darted out and face the Tiger of Dirz. She raised the sword high once more and flames erupted from it, scorching beast and Neuromancer. And then with the burning blade she cut down the Tiger! A Purifier followed her and rounded on the Neuromancer. The Dirz fighter was now surrounded.

With few options left the Neuromancer tried to fight on, but failed to harm either warriors. Even the foul excretions from his skin failed to harm his opponents, and soon enough Misericorde had slain the cloned psychic. All that remained was the Aberration. And Griffin warriors had plenty of ammo!


Wow. Well that game at first felt really tough for the Griffin. Ambrosius took a beating but Misericorde, combined with the aura, was a rock. Able to face down the Aberration (who easily could have dealt her two wounds in that first hit!). But with only four opponents to face, and keeping Ambrosius alive and focused on releasing the Purifiers, I soon had the team gathered together, making the most of the fighters and their conviction and auras.

In hind sight Ben could see that he needed more fighters to separate and knock out Ambrosius. Also, given the way the mission starts, a fighter could have chased Ambrosius and used a skilled movement to prevent him moving (or even Misericorde) and slow down the race to the objectives, and so give time for other fighters to get in the fight.

Well, that is all for the next few months as I move country. I will blog more about Confrontation and Rag'Narok, and then, hopefully in June, Hybrid will return, as we delve into the missions of Nemesis.


Tuesday 10 February 2015

How to Make Planets 2


I forgot ages ago to show the final result of my planets for Noble Armada (I'm working on the third edition currently)


The moon had a nice rough texture. A good dark grey base cost, followed by a number of lighter grey and white dry brushed highlights.


Habitable planets, need water (nice blue green oceans), and continents and land masses using browns, lighter orange tones for deserts, white for the polar regions, and green for rainforests etc. 


To start blues were used to give a feeling of strata of clouds.


The initial pass I wasn't too happy with. So more colour tones were added, and as you can see that gas giant is looking great.


Meanwhile, want to join the playtest?


Friday 6 February 2015

Confrontation Activation


Last time we reviewed the profiles of models in the game, and the turn sequence. In this blog post, we will look at the activation of models in the turn sequence and what actions they can perform.

Within the turn sequence a card being used in the sequence represents a number of models. This means either a character or monster, or in the case of troops, typically 3 models are activated by a card. In the case of more than three models being on the table then there must be enough cards in the deck to represent them all. But this can be done in various ways. Either 3 models can be represented by a single card. Or 2 cards can be used, where one card will activate two models, and the other when used will activate another fighter. So with enough models and enough cards, models can be activated in a variety of ways.

When a card is use to activate the fighters it represents. There are a number of actions the models may each perform.

Exclusive actions are actions that may not be combined with other actions:


  • Moving under cover - the model moves at a reduced rate but is harder to hit. The model must not be engaged in combat. The model moves at half rate. The model, as well as being harder to hit, does not block lines of sight 
  • Charging - the model, if not engaged, moves at double rate towards a model within line of sight (180° from the front of the model base) to the target, such that the model comes into contact. This must be announced before the charge is performed as the model may not reach the target and so fail the charge.
  • Engagement - the model moves to bring itself into contact and so close combat with an enemy. This is different to a charge. The model still moves at double rate, and is able to disengage from an opponent to engage a different opponent.


Cumulative actions are those actions that may be performed in combinations with each other:


  • Walking - movement up to the movement rating.
  • Running - double distance movement, and typically the inability to perform other actions.
  • Firing - firing some sort of range weapon, with the difficulty modified if the model moves before or after the shot (thus movement intentions should be declared before the shot is made).
  • Mystic action - incantations and divinations actions (more on them in future blog posts). They can be made before or after movement (just like firing), and in combat.


Warrior-Mages and Warrior-Monks can perform a single mystical action before engaging an opponent in combat. The mystical action can be repeated multiple times e.g. casting the same spell a number of times and then engaging the opponent in combat.

In select circumstances a model can essentially charge multiple models at once, something which is normally not allowed.

Charging comes with some benefits if the force of the charging model/s is greater than that of the model being charged. Force relies upon the size ranking of the models. A model that is charged and subject to a greater combined force, the model suffers -1 on INT, ATT, DEF and AIM ratings.

Disengaging from a combat relies on the model having not been charged or engaged in that turn. And the model must have an edge of its base free. An initiative test must be passed, modified by the amount of opponents in contact. Or, the model can pass a strength test, so long as the model is the largest model in contact. A model disengaging may engage another model, but can only move up to the movement rating, rather than double. Failure at disengagement means the model must place all combat dice in defence and is marked by a defence counter.

Next time, we will look at shooting and combat - the art of war.


Wednesday 4 February 2015

Confrontation Initiation


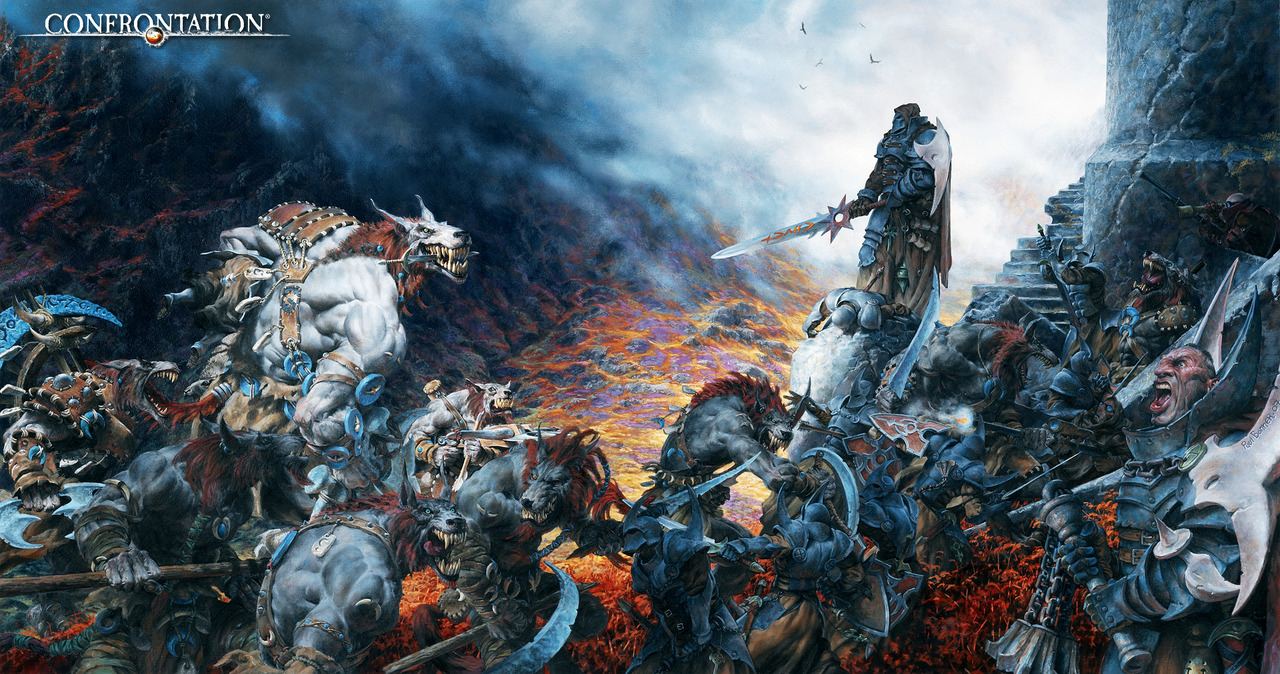
Confrontation is a skirmish based wargame by Rackham. The models they made are 28mm, and highly stylized, so the extent that the artwork and miniatures are practically one for one matches in every way.

Confrontation, in the first two editions, provided the rules for the models by two means. Firstly, almost as a standard adopted by other companies in the day and age, the models were supplied with all the reference cards to make use of the models in games. This meant a stat card, and a number of extra cards that may gives rules on special items, magic, or even campaigns to play, plus card counters to represent health levels and mana gems. Additionally, the rules for Confrontation were provided as small booklets. The core rules were of course within the "Confrontation" booklet, with other booklets, often provided with the relevant miniatures, containing the the rules for magic, war machines, and more.

Confrontation 3rd edition had two boxed sets. A starter set that included a number of models and the quick play rules, and the Initiation boxed set, that contained a number of models and the soft back version of the 3rd edition rules.

Miniatures in Confrontation come on square bases, much like Warhammer, with movement measured in centimetres - this is a French game after all, but then the measurements are all in 2.5 cm increments i.e. inches.

Lets first look at a stat card for a model, as these cards have two purposes - rules and stats, and determining the order of model activation.


Looking down the left hand side of the card are a number of emblems. The first is Movement. This is the movement rate of a model if it walks. Running means a model moves at double rate.

Next down is Initiative. This is used to determine the order in which models fight, and thus who gets the advantage when allocating combat dice.

The next emblem is Attack and Strength values. So the first number is the ability of the model to strike opponents, and the second number is the strength of any hit in close combat.

The next emblem and pair of values grouped together is the Defence and Armour, which of course rate the ability of the model to block attacks and resist them if struck.

The ability of the model, if armed with a ranged attack, is the next emblem down, called Aim.

Following the Aim emblem, is the Courage emblem. The value here measures a model's ability to resist the urge to flee and cower in the face of a terrifying opponent. If this symbol has the colours reversed, then the fighter has a Fear rating instead, and so can cause models to flee.

Finally, the last value is Discipline, and rates a model's abilities to perform complex tasks.

In the Equipment list, are of course the names of armour and weapons the model wields. Some of these may have important properties, and of course lists the ranges - short, medium and long - and Strength of ranged weapons.

The Abilities, well, list the abilities of the fighters, these being certain properties that will make the fighter unique and more skilled in certain conditions.

Under that we have the Rank of the fighter. This can have certain implications to how fighters are influenced, and the symbol on the bottom right hand corner also represents the rank - though rather abstractly in no memorable manner. The number in the bottom right is the Army Point, A.P., value of the model.


The picture above gives an example of a magic user, primarily a mage. The rank symbol bottom has a small number about it. This is the power level of the mage. This is the maximum number of mana gems a model starts the game with, the maximum a mage can have when mana gems are recovered, the base value used for magic incantation rolls, and double this value, is the maximum intensity, when summed together, of all spells a mage can known in game - spells of course having different intensities. Warrior Mages differ in that they can only have their power value as the maximum intensity. Mages can have any combination of mana gems (Light, Darkness, Earth, Air, Fire, Water, Neutral) so long as they are a mage in command of those elements, as noted in their abilities.


Above we have an example of a priest. These fighter call on the power of gods. Their rank emblem has three values about it. Go from the top, in an anti-clockwise manner, we have rankings in Creation, Alteration, and Destruction. The ranks in each of these will represent the maximum skill they have in each of those aspects, and thus the Miracles they call must have aspects either equal to or lower than the respective value for the priest. The summed value of these aspects give the priest's Faith. This is the base value used for rolling the Divination test when calling upon a miracle. This sum of the aspect values is also the starting Temporary Faith, which is used to power miracles. More T.F. is obtained in each round based upon the rank the priest is, and the number of followers of their god that they have in range. These points are then lost as miracles are called upon.

To finish this introduction to Confrontation let's look at starting the game, and thus the turn sequence.

Games are played using forces that have a summed A.P. that is typically equal. Based upon the A.P. level of the game, there is a maximum number of fighters that be used in each force. a 100 A.P. game has a maximum of 5 models a side.

The game consists of the following phases:

  1. Strategic.
  2. Activation.
  3. Combat.
  4. Mystical.
  5. Maintenance.
In the Strategic phase fleeing fighters are rallied. The each player must prearrange a deck of their stat cards. Characters are represented by their own respective cards. Otherwise a card of a fighter type represents up to three models. The arrangement of the cards of course is done in secret. This adds an element of the unknown to how the game will unfold. Of course it can be that one side has more fighters than the other, and more cards.

Once the cards are arranged, a Tactical roll is made. The roll uses the Discipline of the commander of the warband, with the highest D6+DIS winning the roll.

In the Activation phases the winner of the Tactical roll has the "lead". This player may:

  • Draw a card from their pile and activate the fighters it represents.
  • Draw a card from their pile and place it in "reserve" for later activation.
  • Draw a card from their pile, place it in reserve, and also activate the models represented by one or more cards held in reserve.
  • Activate the fighters for one or all the cards in reserve.
  • Draw a card, activate the fighters, and activate one or all of the fighters using the cards in reserve.
  • Pass the turn.
The winner of the Tactical roll can have at most 2 cards in reserve at any one time, while the other player has at most one card.

To pass a turn a player must have less models in play. They can only pass the turn if they have less cards in their deck.

For now we stop there. As we can see, Confrontation has a very interesting, double blind, turn sequence. The use of the reserve pile can also be used to coordinate devastating charges, while also blocking counter charges. This is quite the departure from the typical alternating turn sequence - as it has more forward planning - and of course is very different from the typical "I Go, You Go", of Warhammer. Rackham makes this approach to turn sequences a key feature of all their games, where the order in which models are activated is involved, but adds a deep, tactical aspect to the game. Bluffing is clearly important in the games.

Next time, we shall look at what happens when a model is activated.

Monday 2 February 2015

Rag'Narok - A time of war approaches


So over a few blog posts starting later this week I will be delving into this game, and Confrontation, looking at what makes both rather unique games and sorely missed.